New Fabricator

NEW FABRICATOR

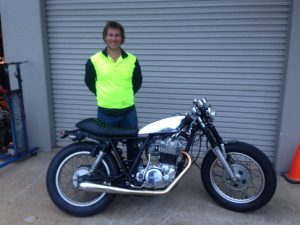
We are stoked to welcome our new fabricator James to the family. With James comes over 20 years of fabrication experience in most aspects of metal work. With so many welding tickets under his belt it’s surprising he can even do up his buckle!

Although his focus is welding and metal work, James appreciates the noises coming out of our Dyno room as much as anyone else and so expect to see him helping out with tuning as well as time goes by. Let’s face it, we’d all hang out there if we could (with appropriate ppe of course?) We’ve been discussing which spirit is considered appropriate and it’s a 50/50 split atm.


So expect to see a lot more custom parts and bikes start to flow again as we welcome James into the fold and we convince him to find another more custom bike to join his Buell!

Motorcycle won’t start: Carb issue

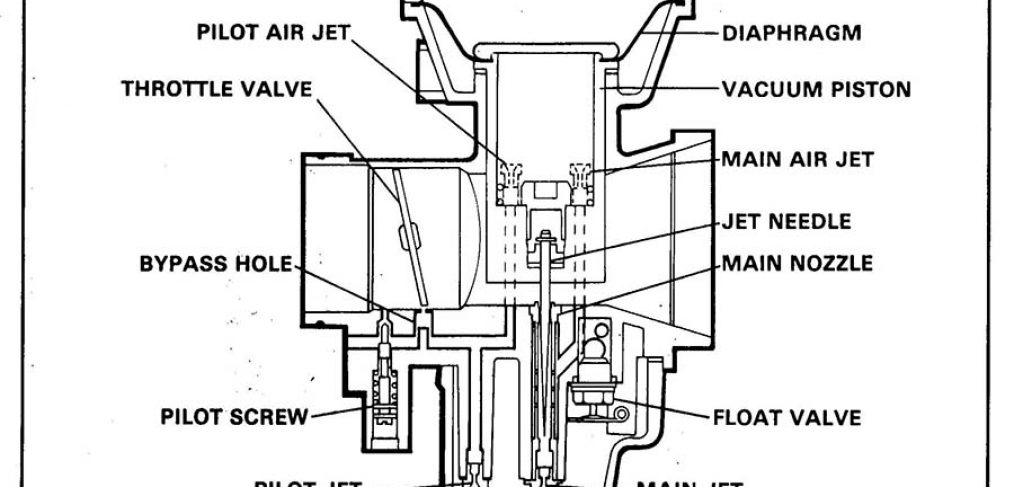
Motorcycle carb issues are the reason a lot of people get in touch with me. What I’d like to outline here is things that you can do to get your bike running. I have used all of these ideas myself for many years and with great success.

Often if a bike will turn over but not splutter into life it is a fueling issue. Lets say we know it’s not a ecu/points issue and the coils are good. Have you checked the plugs? Replacing the plugs is a cheap failsafe before you go any further. Look at the old spark plugs. These are the window to the heart of your bike. If they’re black and sooty it’s telling you there’s an issue with overfueling or oil leak issues. Alternatively if the plug is dry you aren’t getting fuel into the chamber. There’s a couple of handy tools at this point. A colourtune is literally a clear window where you can see what is happening in the spark chamber. You can also get a spark tester which sits between the lead and the plug and is a safe way of checking a constant and strong spark. Alternatively just sitting the plug on the side of the motor and hitting the start switch should show you spark.

Now do you have clean air getting into the carb? Check the air filter for blockages/dirty foam etc. Replace if necessary. It’s cheap and do you want rubbish getting into the heart of your beast. If ever I’m not sure that it is a fuel issue I will use ether at this point. A little squirt of aerostart on the filter as you are cranking the motor should get some action to bring a smile to your face. DO NOT get so excited at hearing your bike going that you empty the entire can onto the filter and come up with new and exciting ways to run the bike full time off ether. If this method didn’t at least get some action then I would go back and check for further electrical issues.

Now for the fun stuff. I won’t go into specifics here because there are so many different styles of carbs but I will give you an outline of what to try. First make sure you have fuel and it’s fresh in your carb. Most carbs have a drain screw at the base of the bowl. Find it and open it up. Try to catch the fuel that comes out. If no fuel comes out it shows that you may have a blockage or a faulty fuel tap. If fuel comes out and it smells like metho.. or in fact anything that isn’t fuel throw it away and allow your tank to fill it up again. Of course I am assuming you now have clean fuel in your tank by draining all the old fuel out.. yes ALL of it.

With fresh fuel in the bowl you try it again.. of course your battery is now flat so you put the charger back on the battery and crack a beer while watching youtube clips of bikes that actually run. Several hours later you come back and try again. Good news it runs. Your journey ends here.


Bad news: still not running. Time to pull the carb/s out of the bike. Remove the bowl and check for debris in the base. Clean thoroughly and use an air compressor to clean any little orifices you see. If things are really bad this might be time to take it to someone with an ultrasonic cleaner.. you decide no I am the master of this machine and nothing will beat me. Good for you. Find the idle jet and remove from the carb. It’ll be stamped with a number 15-25 is a pretty normal range. This needs to be really clean. You can use a needle or a proper jet cleaner and make sure it isn’t blocked. Even if you can see through it there can be build up that will definitely affect it so do this part right. Probably 80% of bikes that don’t run that have been sitting for too long will have been fixed at this point so re install jet. Check the rest of the carb including diaphragms, main jet and mixture screw. Take notes of everything you have done. A quick list like this might help.

Pilot Jet size:

Main jet size:

Needle position: ie 3 from the top

Air/fuel mixture screw: ie 2.5 turns out


This information will help you later when you want to double check your setup against a stock bike etc. Everything is installed again and you’ve checked that everything is sealing well. Again you hit the start button and after a couple of turns with the choke on she fires into life.

In the next post we’ll start talking about checking float heights and mixture screws.


Any questions Contact me here.


Motorcycle Dyno Room in Capalaba

Motorcycle Dyno Room in Capalaba

 For the last 6 years we’ve been busy carving out a niche in our little part of the world. When I say little I really do mean little. How we’ve had upholsterers, metal polishers, metal fabricators all working out of our Capalaba address has been quite remarkable. Now though we have a Motorcycle Dyno room right here in Capalaba.


With every activity we have gained tools and products. With every custom bike we have gained literally shelves and shelves of stock parts. Now against our better judgement it is time to cleanse our minds and our workshop. So we are literally throwing all this stuff out to make room for a new Dyno we have just bought. With new capabilities and faster and more accurate results we hope to do more than we ever have in the past.


So for now we are concentrating on our new dyno room and the normal auto electrical work that we have always done. So whether you need a Power commander unit installed or a set of carbs set up like new get in touch and we can make it happen!


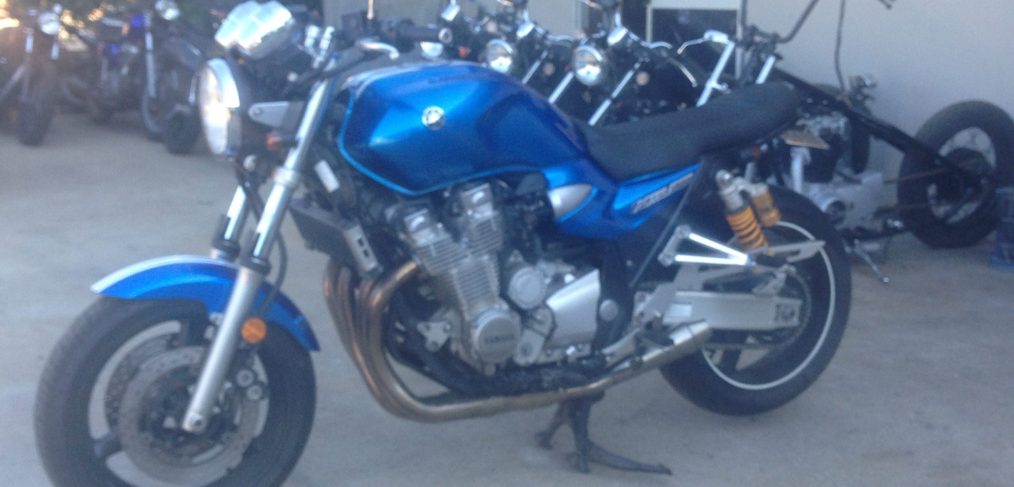
XJR1300 Build

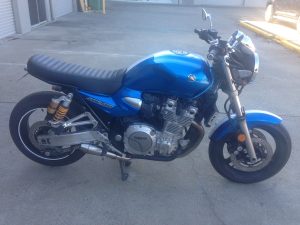
One of our favourite bikes is the XJR1300. We wanted to follow the feel of the squarish tank etc through the back end of the bike so rather than the standard looking loops and kicks that go on the back of cafe racers we decided to do a squarer cut off but still have the front of the seat look like it flowed straight down from the tank. The finished product on the back end we think is pretty spot on. The 2 wasp exhausts make an awesome noise and although we didn’t get it on the dyno, it felt smooth all the way from idle through the rev range and got there a lot quicker than stock.


All the electrics we were able to hide up under the seat and it has a really tough front stance and shows off the ohlin rear shocks nicely.

New Dynomometer in Capalaba Workshop

New Dynomometer in Capalaba Workshop


That’s right we now have full tuning facilities in house. Big props to Serco for allowing us the use of their facilities but now we have to put on our big boy pants and bring it all in house!

What this means for you:

Discounts on dyno runs during the first 3 months of operation. We will be doing this for $100 a run for the initial period (because we are excited and want to use our new toy)

Faster turnaround of tuning. In the past we’ve done all our tuning by the 5 senses. Checking plugs, smelling exhaust, temperature of gases etc. This gets us 95% of the way there but now we can be sure the bike is as good or better than when it came out of the factory.

Tuning comparisons: Trying to get every little drop out of the bike for torque/horsepower? Yes we can!


What this means for us:

More time spent tuning the machines we love! Yeeha

Satisfaction of knowing it’s done perfectly

We will be including a lot more of the Dynojet range in our line up over the next couple of weeks.

Being able to do a lot more with fuel injected machines. Before it was 90% carb, 10% fuel injected. Now we want to even things up a bit… but not too much!

Making Tail Loops for Custom Motorcycles

Making Tail Loops for Custom Motorcycles

We’ve been making frame loops up for quite  a few years now for custom applications on Cafe Racer frames, subframes etc. In this time we’ve made several dies to make this job easier.

Here’s a vid of how we make the dies.

When an order for a loop comes through we are able to make them same day like this:

Making lugs to fit inside the frame and loop

Unfortunately for us Australia doesn’t have the same access to imperial sized tubing that America does. We have struggled to find tubing that we can use for lugs when welding loops to frames. Not only is it impossible to source the snug fit needed for the loop in just about every case the frame inner tube diameter is different to the loop inner diameter.

Here’s what can be done with the enough time and energy.

  1. Find a suitable solid round bar and cut 2 pieces 60mm long
  2. Using a metal lathe bring the entire outer diameter down so it fits the larger of the inner diameters of the loop of frame
  3. Now make a step in the stock by using the lathe to turn down approx 30mm of the stock to the smaller of the inner diameters.

That’s the best way but there is another way which is a lot less time consuming and will do the job.

  1. Cut 2 sections 40mm long off an existing loop. (equal amounts each side rather than both off one side for obvious reasons)
  2. along the length of the offcuts use a cutting disc to take out approx 5mm of the long edge
  3. Now you can use a vice/hammer/clamp etc to shrink the diameter of the tube so it can fit inside the frame loop
  4. Further modifications may be needed to make it fit inside the frame but you get the idea

Get Cutting!!!!


p.s. Here’s the page on our site if you want to order one of our loops..

Link

We Like Modern Bobber Builds


We Like Modern Bobber Builds!!

How many people have we pissed off already just with the title? I know what the purists are thinking..

  1. It’s an oxymoron
  2.  Therefore you are an oxygen burning moron
  3. If it has shocks then it isn’t a true bobber
  4. Kicking a bike into life is the only way to go
  5. What?! You didn’t spend 100 hours building up that motor. Go away!

Yeah and in truth I may have said these things to myself as well but.. hear us out. Most people out there love the look of a gorgeous bobber. Maybe they don’t want to wait 6 months for it to be built. Then there’s the shame of stalling at the lights when you were trying to impress that girl in the Hyundai beside you and having to kick the bitch back into life!

Whatever it is, modifying a late model cruiser is an alternative. We’ve done a few and it has to be said that the ease, budget and timeframe all make it a novelty for us.

We had just such a customer come to us recently. Andrew had moved on from his LAMS and was wanting something that would eat the km’s while still looking the part.  A fairly clean XVS1100 was found for the right price and minimal damage to the exhaust (first thing to go anyway) so we snapped it up for him and he showed us pics of what he had in mind.

yamaha-xvs-1100-a-dragstar-classic-1

Candy apple red, whitewall tyres and some straight bars were the order of the day. Of course lowering the bike and doing something about the guards was always going to happen as well.

3

We make lots of kits up for the XVS650 and it didn’t take much modifying to transplant the guards from one of these to work with the 1100. We needed to do this first as the paint is what tends to hold us up on these builds.

Once we made the guards out of steel, it was time to strip everything else off the bike and make the three piles. Chrome, Candy and Black. The candy went to our painters and the Black to the local powdercoaters. As it was only a couple of pieces that needed chroming we thought we’d polish them oursleves in house to make sure everything could go back together in a  timely fashion.2

The seat we had earmarked for the bike was a no go after we got it on there and realised it looked ridiculously thin compared to the oversized tank so it came down to a Stock Heist seat or one of the fat Biltwell seats.


Whitewall tyres went on next. The old ones were no longer roadworthy so it’s not like it was a waste. unfortunately there is only one company that makes 19 inch whitewalls and we couldn’t match the tread to the back but it wasn’t unusual to have un matched tread patterns when I was growing up anyway;)

Now the only hold up (and believe me it was a proper hold up) was the paint this time around. Our two week turn around became a 5 week turnaround due to holidays etc so we were stuck dragging this heavy lump of lead around until we got the call we had been waiting for. Within hours everything was back together.

5

We hadn’t shown Andrew the bike during this period. He was good enough to trust us with the small things and see we wanted to make it worthwhile. When he arrived he was stoked. Even at 5 weeks we had managed to deliver a bike that sounded awesome thanks to some straight pipes we made up for it as well as handle the road and absorb ‘most’ of the bumps that came his way. It’s still not a light bike but the stand over height has been improved and the motor with a touch under 40k on it has plenty of life left in it.

ROAD TEST

Time to take it for it’s first road test. The bike felt a lot lighter than when we started. Maybe that’s just psychological?! lol. The front end definitely tracked better and helped with the lighter feel though. The pipes are loud! A couple of extra baffles meant that it took the edge off it though so longer rides were a lot more enjoyable. Overall the impression I got from this bike was it was more than enough. Don’t get me wrong. I have a 1584cc Harley as well as a couple of 1100’s, 1200’s and even a 1400 Suzuki in the shed. This bike though with it’s single seat and low slung ride height felt like a rocket ship. Maybe it’s because most of our Bobbers are around the 650cc size that this one just swallows up the kilometres like a champion.

Overall a very happy customer and a bike that we would ride long after most hardtails were left behind.

4

(thanks to Andrew for the pics)


We guarantee the best price on all POSH parts for your Custom

We guarantee the best price on all POSH parts for your Custom

As most of you know we have been in partnership for many years with POSH Japan. Our goal has been to offer the biggest range at competitive prices. We’ve achieved both these things although occasionally customers ask us for something that we don’t have and we are able to include into our catalogue.

We want you to do our work for us now though. If you find anyone in Australia selling POSH parts at a better price than what we offer (only new and not including postage obviously) let us know and we will drop our catalogue price for all of our customers.

Upside:

Best price guaranteed

Awesome Japanese quality

We get to practice our Japanese more

You do our market research

Downside:

You have to think of other parts to spend hours online shopping for now!

Check out our online catalogue here

VX800 Commazuki Build


vx800


VX800 Commazuki Build

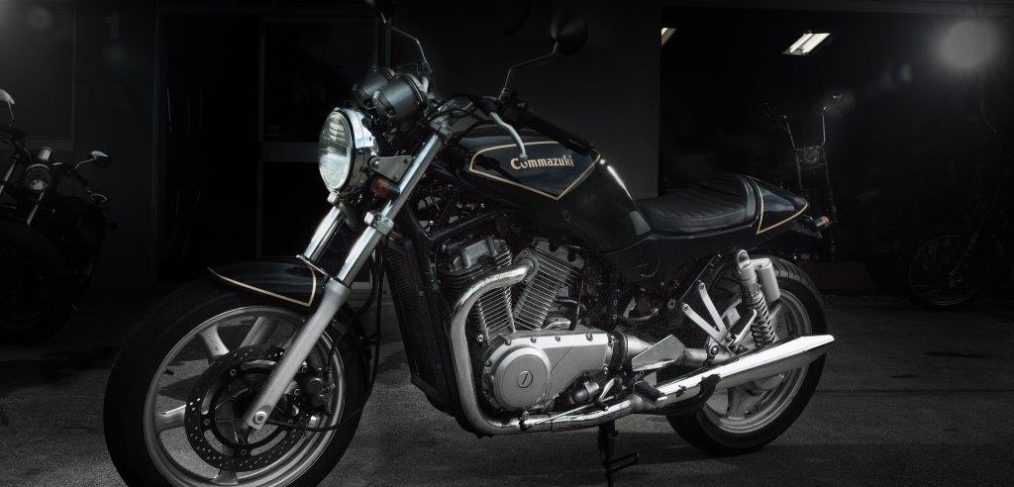
We could go on about what Suzuki was thinking when they made this bike. To be honest it’s not the worst looking bike they ever made (arguably the GSXF wins that title.. don’t even bother looking it up)

Occsaionally even in this market barn finds make their way to us. An old CB750 or KZ etc. still with race gear all over it that we get to dust down and ogle over. A customer of ours brought his rolling dust hill to us so we thought we might have something quite exciting.

Once the cobwebs were cleared away we found an ordinary looking VX800 in standard trim that hadn’t been ridden for many years. We could go on about what Suzuki was thinking when they made this bike. To be honest it’s not the worst looking bike they ever made (arguably the GSXF wins that title.. don’t even bother looking it up). The idea of transplanting their successful cruiser 800 motor into a road bike and giving it a longer lower stance then most was bucking the trend.. but sometimes trends are trends for a reason!

So the first thing was to get it running. Naturally the carbs were gunked up with something that could have easily come from a 70’s horror movie. Once they were sorted and brakes rebuilt we had something that would at least roll down the road. Turns out it didn’t just roll down the road it picked up with quite a bit of torque. More than our metal fab guy Josh was expecting. All this low down power perfect for rolling ont he throttle and pushing through curves etc.. exactly what we like!img_7108

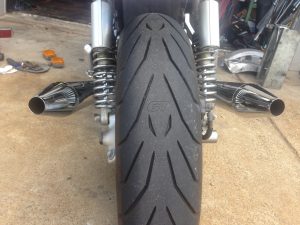
Next thing was the strip down to see where the bare lines were. With about 20 kilo’s taken off and that ugly exhaust we started getting a feeling for what we wanted to achieve. So we mutated a back end we have used on some old cafe builds to the side panels of the existing bike. Nobody (I hope) likes that look of parts thrown onto a bike and looking totally out of place so we had to integrate the lines that match the tank etc to a much smaller, lighter back end. It was about now when the customer came to us with pics of a few different bikes he had been perving on for some time. Amongst them was this back end from a Norton. Normally the exhausts look heavy and too long for our bikes but this time it would fit what we were trying to achieve.

img_7106

Exhaust sorted and electrics underway. Around the workshop we always give our bikes nick names. Most are favourable… some are not. This one became the ‘Commazuki’ and while chatting about it over a drink with the owner I let the name slip out. Definitely not the lines of a Norton Commando or a Suzuki but the name stuck and next thing the purple ‘phantom’ paint job was ditched for something a little more traditional. in Black and our own gold mix.

img_7109

Airbox was removed and pods put on to save weight and getting the motor breathing easier and low and behold even with the new exhaust the bike ran better. Anyone who seriously mucks around with Suzuki’s knows how asthmatic they can be and how much better they perform when let breathe properly.

Time for a trip to the dyno where we found out the front was lean and the back super rich. Now we have a nice fat torque curve and another 15% on top. Add the weight savings and we are in rider heaven again.

Final touches are the indicators and new tyres and the new owner Heath has a very unique bike that turns heads everywhere he rides.

Custom SR400 running around Brisbane Streets


Custom SR400 running around Brisbane Streets

we would rather wrap gum boots to the rims and baste ourselves in vaseline during a torrential rainfall then put a set on a daily rider.

img_7078

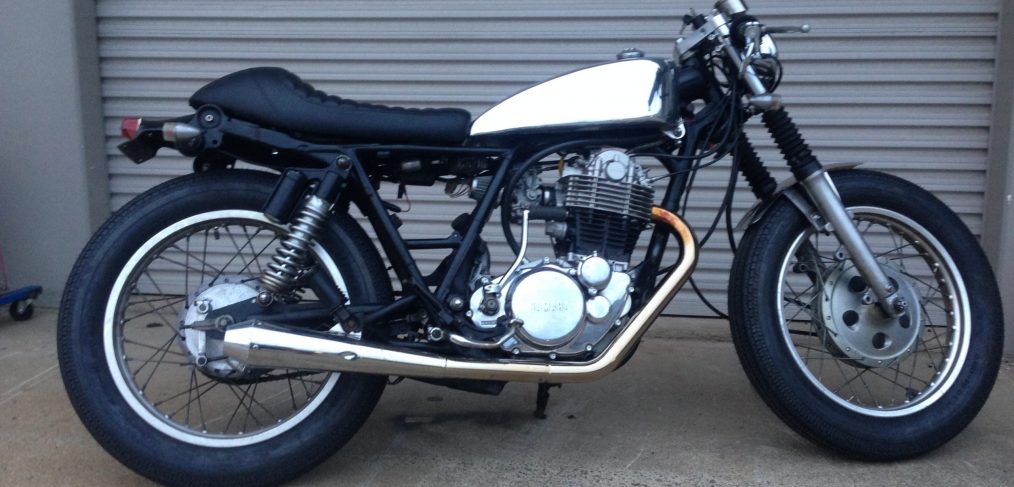
Recently we had a call from a guy chasing an SR400. To be honest it sounded terrible. There were plenty of modifications necessary, it was to a deadline and he already saw a bike that he wanted to borrow heavily from. Having said that, we did just have a container of bikes come in from Japan and even though we weren’t even 100% sure on what had made it into the container we thought there would be an SR that might be a good starting point. We worked out a budget and realised we could do everything he wanted for less money than it would cost for a new stock SR.

The deadline was a big national ride coming up with all proceeds going to Prostate cancer research and the customer really wanted to do the ride with his long time friend who has been diagnosed with cancer recently. We can’t think of a better reason to help get a guy on the road and it had been a few months since we did a pre-fuel injected SR.

First up the strip back including getting the motor out and painting/polishing. The bike we chose for the donor had an aftermarket hotdog pipe on it and air pod from Japan. It seemed to run ok but later we found out that the bike had still had the standard jets in it.

Most of the parts on this bike are off the shelf. Posh make the headlight and bracket as well as indicators and indicator brackets. Maybe not totally cafe racer style but at this stage there were plans afoot (more on on this later). We also stock the guards and the seat is a Mostyn one so overall we thought it could be done in time for the ride. Anyone into SR’s knows how many aftermarket options there are for them and with our catalogue of over 250 parts specifically for SR400 and SR500’s we might even have breathing room.

img_7081

Turns out we didn’t have to worry as even the tank was one of ours and within a week of us getting the bike on the hoist, we had it in it’s current form. The notable exception were the tyres. Chester really liked the look of Firestones but unless the bike is only for display purposes we would rather wrap gum boots to the rims and baste ourselves in vaseline during a torrential rainfall then put a set on a daily rider. Instead we heard Shinko had bought out a new ‘classic’ tyre and it handled better and still had that look he loved. We did have to wait for them to come into the country but it was well and truly worth it.

img_7080img_7079

 Now that the new exhaust and manifold were on the bike and we had the air inlet the way we wanted it was time to see how she went. Average is about the best you could say. We never need much of an excuse to get one of our bikes on our state of the art dyno so that is precisely what we did. Turns out it was mega rich except at idle. Plenty of cursing and a couple of changes later we had a smooth power line running with a perfect mixture right from idle. We got so much more top end out of it, I have no doubts this one could join the ‘ton up’ club!

Initially the idea was to fix this one up for the one ride (just cafe racer enough) and then do a proper pull down and make a hardtail SR that would go like a cut snake. After Chester rode it there was a slight change of heart and now it looks like this one will stay as it is and another SR or XS will be sourced to do the hardtail conversion. Check out our facebook page for that update:)

img_7082

If you want something similar or want to know more about this (don’t bother asking about jetting as we’ll take this info to our graves hahaha) hit us up on our contact page or through any of our social media pages.

Our Custom Build Page

“You’re only limited by your imagination!”

CAFE RACERS

Mostyn Wild

This build is one in a series of Braaap Mercury builds we are doing.

The 'Wild' includes:

  • Whitewall tyres
  • Custom paint
  • Airbox removal
  • Custom seat
  • Different handlebars/graip and mirrors
  • price: $7000.00
Mostyn Envy

The Mostyn Envy is one of our favourite Cafe Racer builds to date. The call was for a british racing green 'but in metallic'. The chocolate diamond stitch seat works really well with the colour.

The upgraded carb meant we were able to clean out the space where the airbox would have been and get another 10% performance out of the bike. Small touched like the headlight grill, bars and mirrors just finish it off.

Price:$4900.00

Mostyn Mild

Mostyn Mercury ‘Mild’   Introducing the dapper gentleman motorcycle in our range of Mercurys. The Mostyn ‘Mild’ is a brand new Motorcycle designed right here in Australia.   Features of this great bike include:

  • Shinko Whitewall tyres
  • Café Racer Looks
  • Bar-end mirrors
  • Chrome Guards,
  • Flat Handlebars
  • 250cc motor
  • This whole package is available right now for $5500.00
CB550/4

This CB550/4 started off life as a quazi bobber with questionable characteristics. What we ended up with is a light and growly machine that had no troubles in the twisties and looks great standing still.

POA

BOBBERS


Interest Free Finance available on all Motorcycles at Mostyn

Interest Free Finance available on all Motorcycles at Mostyn

Motorcycles are cool. Our motorcycles are cooler. Getting one NOW is coolerer (yes it’s a word in our dictionary haha). So how can we make this happen?

The boys in our finance kitchen have been working hard to land a deal for any of our customers wanting to purchase a bike on finance. With recent changes we can now offer you low interest and 6 months interest free terms available.

What does this mean for you? Come in and check our range of bikes. We can put a quote together with any modifications and/or gear you need and in most cases have you approved within 30 minutes

.IMG_6670